Showing posts with label Nef. Show all posts

Friday, 19 October 2012

Back to the Basics Part III: ISO

Back to the Basics Part III: ISO

What is ISO?

ISO in the photographic world applies to both digital and film photography. For film cameras and photographers, film refers to the sensitivity of the chosen film medium when exposed to light. It is measured in numbers in a stepped sequence, like this: 100, 200, 400, 800. This was also an indication of how much grain would be in an image, the higher the sensitivity, the higher the film grain. When you use a lower ISO film the film grain becomes much finer.

In the digital world ISO applies again to sensitivity, but this time to the sensitivity of the imaging sensor. The same principles for choosing film ISO, applies to the digital world. A change to the ISO system exist though; the grain in your images is known noise.

How to use ISO

If the scene or you wish to photograph is well lit then it is a good rule of thumb to try to shoot as low an ISO as possible, on most modern digital cameras this will be 100, 50 on some higher end models. If it is dark and you do not have a tripod or want a fast shutter speed, a higher ISO speed can be used to capture more information in the chosen shutter speed. This however comes at a price, that prices is your image will have more grain (film) or noise (digital). This will soften your photographs and add seemingly random coloured pixels to your image. I have illustrated this below with two different pictures.
The bus drivers seat, was taken at a high ISO, 640 to be exact, you can see in the shadows the noise. Click on the image to expand.


Now for companion's sake look at this photo of a downtown street. It was taken at 100 ISO, if you click and expand you can see the low appearance of noise.


Friday, 12 October 2012

Back to the Basics Part II: White Balance

Back to the Basics Part II: White Balance

How it works

White balance is a setting contained within your photographs that determines the adjustment of colours within a photograph needed to match the colour of light shown by the light source. The object of this matching process is so that white objects appear white under varying lighting conditions. While most light sources appear white to the naked eye, the truth is there is a wide range of colours cast by traditional light sources. For example, light from the sun is a very cold blue and a traditional tungsten light bulb gives a very warm orange to red colour. The imaging sensor in modern digital cameras reproduce the colours cast by these lights exactly, and without processing and white balancing, the colours in the photograph would seem to change from light source to light source. Normally auto white-balance would correct any issues, however it is not perfect and for greater control and artistic leverage, the manual function for white balance can be used to derive very different results. These differences are illustrated in the photos below.


In this photo you can see that it has a blue colour cast over the photograph, while the background is a orange/ red. this is because there is three different light sources in the photograph, each with its own band of light.


In this corrected version, you can see we've adjusted for the blue in the photograph, however the background is still very orange due to it being a separate colour cast to balance for. It is recommended that you try and minimize the number of differing light sources as it becomes a nightmare to edit more than one at a time.

Friday, 5 October 2012

Back to the Basics Part I: Exposure

Back to the Basics Part I Exposure

Hey! Shutter Science has been writing a Camera Basics tutorial series which will start this week! We will cover the topic of exposure and how it relates to modern digital cameras. Alot of cameras come with auto functions that take care of exposure for you, while it works it does not provide you with the highest quality pictures. Understanding how exposure and how to manually control it, will provide you with a new skill set to bring to the table when you are shooting.


What you will need:

  • A DSLR or point-and-shoot digital camera with Manual function.
  • Thats it this time!

How it works

When you use your camera to take a photograph, you are exposing a digital imaging sensor to light. Before the light hits the center, there are two ways of controlling how much light is picked up by the sensor. These controls are called the Aperture and the Shutter. The latter of which this blog is named for. In order to manipulate these controls you must have a camera with manual mode.


Aperture

The aperture in your camera is a mechanical opening that changes in size to admit more or less light into the lens/camera body. The sizes it can open and shrink to are setup in measured increments and are known as F-Stops. The numbers step up from F1.4 to F5.6, F8, and F11. As the F-stops number increase in value, the smaller the opening of the aperture, and consequently the less light allowed into the camera. It is important to note that with each increase in F-stops means half as much light will be let in.

Shutter 

The shutter is a mechanical blind for the imaging sensor. It opens and closes at an again incremented and predetermined speed allowing only light to reach the sensor for so long. Shutter speeds are measured by fractions of a second, 50 means 1/50 or one fiftieth of a second, and 125 means 1/125. There are also speeds longer than a second or less, which we will touch on later.

How long you leave the shutter open for can vary depending on the situation or the scene and how bright it is. A sunny day may require a shutter speed of 1/200 and an aperture of F8, while a overcast, or cloudy day could be 1/60 with a F-stop of F4

Leaving your shutter open for different lengths of time when properly exposed by balancing out the apertures setting (ie if it is really slow such as if you are shooting a long exposure), can produce different effects in your photographs, especially where motion is concerned. A few photographs will follow to detail this.


Fast shutter speeds will freeze motion in a very clear way as opposed to the blurred effect that a long exposure creates. As you can see in this photo the high shutter speed freezes the water cascading off the rocks into individual rivulets of water. It is worth noting that any shutter speeds under 1/60 or even 1/80 for that matter are too slow to be taken while holding your camera, this will add a type of motion blur called shake to your photo. Camera shake comes from your body's inability to hold the camera perfectly still for that time period, this is okay though, thats why we have tripods.


Slow shutter speeds capture motion very differently, and any object or scene in motion on a long exposure will leave trails of motion blur as the objects travel across the scene. As you can see in the photo above, the water is smoothed out in this scene as it runs off the rocks and takes on a gassy smokey look.

Friday, 28 September 2012

TiltShift Tutorial:

TiltShift Lens Tutorial:


As you may or may not know, TiltShift lenses are a specialty type of lens that allow for adjusting the focal plane of a camera. They are commonly used to capture corrected perspective architecture shots, interesting portraits, or to create scenes that look smilar to miniatures set due to a illusory shallow depth of field (miniatures as in a model town,  or model train set). To capture the look with the lens itself will unfortunately set you back a few thousand dollars as they are high-end specialty lenses and do not come cheap. 
However thats why we have Photoshop; as we can easily emulate and create the look in a few steps!

What you will need:

  • A Digital Camera (DSLR)
  • Photoshop CS
  • A computer (OS X or PC)
  • A RAW or high resolution JPEG to edit
    • Preferably taken from a far bit of distance away from the subject. This effect works best from rooftops and high vantage points over urban landscapes

How To

Step 1:

Open Photoshop and then open your image/photograph.


Step 2:

If you are using a JPEG image skip to the next step

If you are using a camera RAW file you will be presented with the editing dialog window, where you will be able to make various changes to the look of your photograph. Edit and then carry on to the next step. 


Step 3: 

Now that you have your file open in the main photoshop window enter quick mask mode by clicking on the box in the bottom lefthand toolbar or by pressing (Q) on your keyboard.


Step 4:

Now that we are in Quick Mask mode press the (G) key or click the gradient tool on the tool bar. Make sure to select the middle gradient mode highlighted in the second screenshot.


Step 5:

Using the Gradient Tool, create a gradient across your wanted focal point of the photograph. We recommend that you play around with getting the right banded colour gradient across your subject. 


Step 6:

Now that you have found the right gradient selection, toggle off Quick Mask mode by either clicking on the toolbar at the bottom or pressing (Q) on the keyboard


Step 7: 

Now that you have exited Quick Mask mode you will notice there are selection boxes across part of your photograph, this is good, now click on "Filter" in the menu bar and go to "Blur" and then to "Lens Blur"


Step 8:

You will see a Settings dialog box open for the Lens Blur filter, you can match our settings or play around with it and figure out your own. Once you have the desired blur level, click Ok and go back to the main window.


Step 9:

Now that you have your desired blur level, click on "Select" in the menu bar and click deselect to let go of your gradients selection.


Step 10:

To increase the illusion of the photograph being of miniatures or seeming at least far away click on the Saturation levels layer tool on the right hand side and increase the colour saturation in the photograph. When you are done, be sure to select the "background" layer in the layers panel


Step 11: 

Open the Filters menu again and to to sharpen and then to Unsharp Mask. A settings box will open for you to make your desired adjustments to the sharpening effect in. Once you are done click Ok.


Step 12:

We are almost done! 
Last thing to do is to save your newfound tilt-shift photograph so you can show it off to the world. 
Go to File in the menubar and click Save As. 
Specify where you want to save it and save it as a JPEG. 
Once you have done that and clicked Save; a new dialog window will open you prompting you for settings for saving the JPEG. 
Drag the quality slider all the way to 12 or Maximum.
Select Optimized and click Ok


Step 13: 

Thats it! Go to where you saved your file and post it online and show everyone what a amazing lens you don't have. They'll never know!


Friday, 21 September 2012

Creating a Timelapse/Stopmotion video

Creating a Timelapse/Stopmotion video 


Dear Reader, 

This is ShutterScience's first video tutorial. The creation of the video does not require video capabilities on your camera, however you will need to either have a interval function, an intervalmeter, or manually take a frame as often as necessary (more on that later). We hope you enjoy the tutorial and it opens new possibilities for you when out in the field.


What you will need:

  • A Camera (DSLR)
  • A Tripod
  • Windows Live Essentials
  • Photoshop
  • Intervalmeter (Optional: only needed if taking frames manually isn't desired and your camera does not have a interval function)

How To!

Preprocessing

Step 1: 

Choose your scene/focus of the end video and setup your camera on your tripod and frame the shoot.

Step 2: 

Either set the intervalmeter/interval function on your camera to take a frame about every 5-10 seconds. How often and how many frames you capture will dictate the fluidity of the video and its length.

Step 3: (Only if you are trying to create a stop motion video, skip to 4 for solely timelapse)

Move your actors, objects or scene elements a small bit each frame and then capture that small movement with a still. Keep taking stills until you have completed your wanted animation.

Step 4:

Now that you have captured your scene, go home and upload those photos to your computer.
Having done this brings us to the next stage! Processing!

Processing

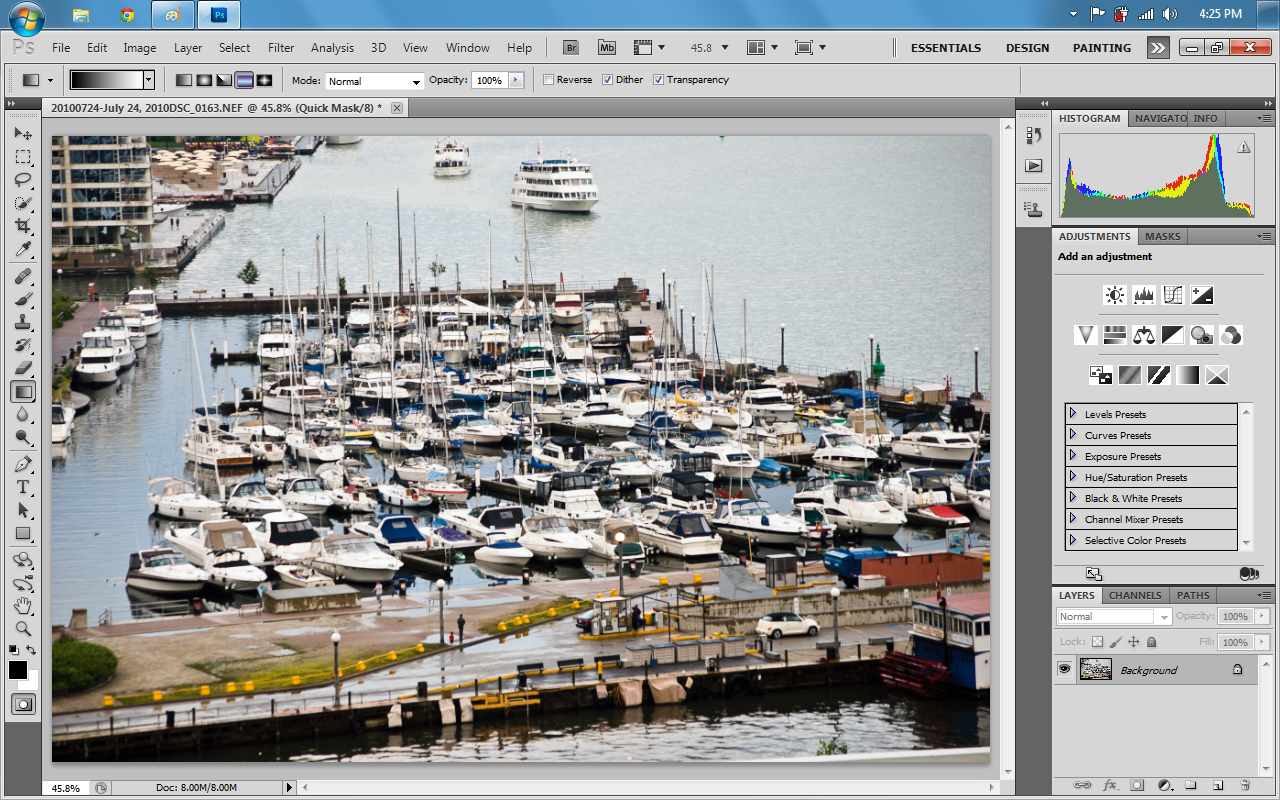
Now that you have all these files on your computer and before we can create a video you must make any visual changes to the stills you feel necessary. So open Photoshop and Open all of those photos in camera raw. Make sure to select all the photos and click synchronize so that your changes to the one are applied to all of them.

Step 1:

Now that you have your folder of images ready and have downloaded/installed Windows Live Essentials if you didn't have it already. Open Windows Live Movie Maker.


Step 2: 

Click on "Add Videos and Photos"


Step 3: Now Navigate to your folder in the "Open" dialog box and select all your photos. (make sure they are arranged by name to save you the trouble of sorting them into the correct order)


Step 4: 

Select all your photos. (Click on one and then on your keyboard press "CTRL" + "A"


Step 5:

Click the Edit tab at the top, and change the duration of your photos (make sure they are still all selected!). The shorter you make the interval for each photo the quicker the video will go. We found that for our example video .09 seconds was best. Play around with it and see what your prefer.


Step 6: 

If you want to add a Title to your video click on the "Home" tab and then click "Title" right next to the snapshot button. This will bring you back to the text tools tab where you will be able to specify settings for your video's title.


Step 7:
Next we will be adding music to our video. This is an optional step we added so you have the option to do so or not. Go back to the Home tab and now click "Add Music" a small option box will open asking you to click one of two options. We selected "Add Music at the current point".


Once the "Open" dialog box opens, navigate to your audio/music file and select it. Then click "Open"


Step 8: 
Now that you have added in your music you will notice it is above all of your slides. This is good and means you have followed the steps correctly.


Step 9: 
Now that you have laid out the groundwork to create your video; lets create it! 
Click "File" (the blue box above paste, beside the Home Tab) at the top and go to "Save Movie"


A new dialog window will open asking where to save it. Specify the location and hit "Save".

A progress bar will appear as Movie Maker makes your video!


When it is completed, you will be presented with a window saying "Play Movie" or "Open Folder". Click whichever you prefer, however if you click "Open Folder" it will open a new Window to your video's location.


Step 10:

Your done! Congratulations on creating your first Timelapse or Stopmotion video!

You can find the example video "Setting up a Tent: a Timelapse" on the ShutterScience YouTube Channel through this link:

http://youtu.be/ArXLzktS3fE

Or just Click Play! 

Friday, 14 September 2012

Hello World! This Week: HDR Tutorial


Hello World! 

This blog will feature a new technique every week for the next few months or so on new techniques for digital photographers to consider when looking through their lenses. The techniques and their tutorials will cover not only the creation of new and interesting still images but also moving images aka videos as well. This is to provide the reader with a more rounded set of skills where photography is concerned by introducing some video content and to broaden their creative perspective by providing different angles to consider before depressing the shutter.

This Week: HDR

This week we will be covering the creation of HDR images. HDR stands for High-Dynamic Range and is a method to create images where there is a high range of luminosity (luminosity is the measure of brightness) between the light and dark areas of the image. It is used to create images that capture higher ranges of luminosity then what is usually capture in a single photograph. HDR photographs are known for sometimes appearing very surreal looking, depending on the photographer, and

Why?

Modern digital cameras while being increasingly sensitive to lower and lower levels of light suffer from the drawback that you can only expose for either the brighter or darker parts of an image. To create images that capture both the bright and dark ranges of a scene, you must create an HDR picture. 

What you will need

To create a successful HDR photograph you must have the following items:


  • A Digital camera with manual or bracketing functions (preferably a DSLR) 
  • A Computer (Mac or PC)
  • Photoshop CS3 or above
  • Tripod (optional) - if you are shooting at night, dusk, cloudy, or otherwise dark situations it will be best to mount your camera on the tripod to provide the same framing for the image three times over.

Pre-Processing/Shooting

Before we can roll up our sleeves and delve into any sort of photoshop or computer work, we have to capture the photographs we will be working with. So go out to explore and find a scene you where you can only expose for either the dark or the light parts of the image but would like to capture the detail and information of both ends of the range.

Manual Mode:

once you have your scene framed up, you will need to enter manual mode on your camera and expose for your scene. Take your first photo. Now set the aperture setting on your camera for two-three full stops lower than your initial settings. Take another photo. Now set your aperture setting for two-three stops higher than your initial settings.

It is worth noting you can also change your shutter speed in place of your aperture. However changing your aperture provides your with better contrast and color differences for exposure level.

Bracketing:

If you have a camera with the ability to bracket (which is just the automation of the process describe above) you can just set your initial exposure, turn on bracketing and then take your three photos.

Processing

Now that we have our three working images, we can fire up photoshop and begin the creation process.

Step 1.

Open Photoshop.


Step 2.

Open the three images you took on your camera in photoshop as separate images.


Step 3.

Now click on File in the menu bar and select automate and then "Merge to HDR Pro"


Step 4.

The following dialog box will open prompting you to make a few choices
now. You will notice you can actually add files from this box without opening the images first, which is handy, however its always good practice to learn the long way first. Now because we have our images already open in photoshop, go ahead and click "Add Open Files". Make sure the "Attempt to Automatically Align Sources Images" box at the bottom is checked. Click "Ok".


Step 5.

Photoshop will now take over with it's automation magic and begin to open each image into a layer in one file and begin to align them (this is really only pertinent if you took them without a tripod or moved the camera inbetween shots). Your computer if it does not have alot of RAM (working memory) might freeze up or take awhile longer then you think it should, but just hang on it will be worth it.

Step 6.

A new dialog box will open with your photo on the left and sliders to change values and subsequently change how your HDR is displayed. I would like to stress the importance of going to town and fiddling around with the sliders, to get the hang of how they affect your image. If at any time you feel you have gone too far with your editing click on one of the presets to reign in your image to something that looks like a traditional HDR image.


Step 7.

Now that you have selected how the output will look, click okay and let photoshop put the finishing touches on your photo.

Step 8.

Now that your image is ready to be exported to be shared online or printed and shown to the world, click "File" once again at the menubar and go to "Save As". Select .Jpg as your export format; JPEG or .JPG/.JPEG is the most widely accepted format nowadays.
Choose the location where you would like your picture to be saved and click save.


Next another dialog window will ask you to set some values for exporting the HDR as a JPEG. Crank the slider quality up to 12 (we all want to see it at it's best!) and choose progressive for a more optimized conversion.  Then hit "Ok"!


Step 9.

Share and Enjoy!!